
Tesla emblem replacement is a precise process demanding specialized skills and knowledge. It involves surface preparation, selecting the right OEM adhesive for weatherproof durability, careful removal of old emblems, even application of adhesive, accurate alignment, and curing time adherence. Professional collision repair shops using high-quality automotive adhesives ensure perfect, long-lasting replacements that match Tesla's unique aesthetic, integral to successful car body restoration.
Considering a Tesla emblem replacement? Navigating the process effectively ensures your vehicle retains its original, sleek look. This guide delves into the detailed steps of the Tesla emblem replacement process, highlighting the importance of choosing the right OEM (Original Equipment Manufacturer) adhesive for durability and long-lasting results. We provide a step-by-step installation tutorial to ensure a safe, effective, and professional-looking upgrade.
- Understanding Tesla Emblem Replacement Process
- Choosing the Right OEM Adhesive for Durability
- Step-by-Step Guide: Safe and Effective Installation
Understanding Tesla Emblem Replacement Process
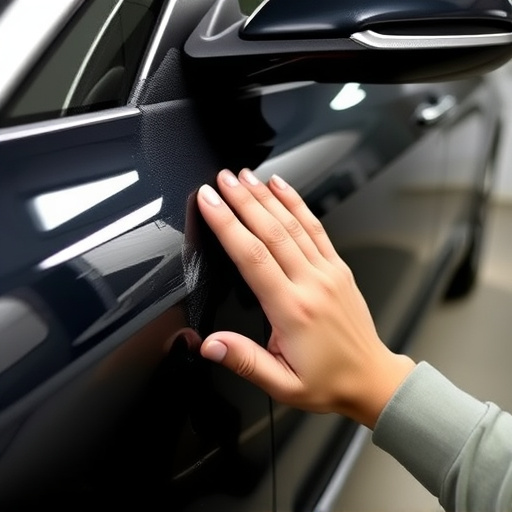
Replacing a Tesla emblem is a process that requires precision and adherence to specific guidelines, ensuring a seamless fit and original-equipment quality. It’s not as straightforward as swapping out a standard badge, given Tesla’s unique vehicle designs and attention to detail. The first step involves preparing the surface where the emblem will be attached. This may include cleaning the area thoroughly to remove any dirt or debris, and ensuring the paint is in pristine condition. A crucial aspect of Tesla emblem replacement is using the correct adhesive, which is typically an OEM (Original Equipment Manufacturer) grade adhesive designed specifically for Tesla vehicles.
This process differs from general car dent removal or even tire services, as it demands a deep understanding of the vehicle’s design and material composition. Collision repair shops specializing in electric vehicle repairs are best equipped to handle these replacements, ensuring the emblem aligns perfectly with the vehicle’s overall aesthetics.
Choosing the Right OEM Adhesive for Durability
Choosing the right OEM adhesive for Tesla emblem replacement is paramount to ensure durability and longevity. When selecting an adhesive for this purpose, vehicle body shops must consider factors such as weather conditions, exposure to UV rays, and the specific material of the emblem and surrounding surface. A high-quality, weatherproof adhesive specifically designed for automotive applications offers the best chance for a lasting bond.
This is particularly crucial in auto body shops where scratch repair and restoration work is common. The adhesive must withstand regular wear and tear without compromising aesthetics or structural integrity. By adhering to OEM guidelines and choosing the appropriate adhesive, Tesla emblem replacements can be as reliable and long-lasting as the original parts, enhancing the overall vehicle appearance for years to come.
Step-by-Step Guide: Safe and Effective Installation
When replacing a Tesla emblem as part of your car body restoration efforts, following a meticulous step-by-step guide ensures both safety and effectiveness. Begin by preparing the surface – clean it thoroughly to remove any debris or contaminants that could affect adhesion. This is particularly important in hail damage repair scenarios where roughened surfaces might be expected.
Next, carefully peel off the old emblem, taking note of its orientation for accurate positioning later. Apply a thin layer of high-quality OEM adhesive, ensuring even coverage. Press the new emblem firmly into place, aligning it precisely with the vehicle’s design. Maintain pressure consistently for several minutes to foster maximum bonding. Finally, allow adequate curing time as per the adhesive manufacturer’s instructions, enhancing the durability of your Tesla emblem replacement and ensuring an automotive restoration that stands the test of time.
Tesla emblem replacement is a straightforward process that, when done correctly with the right OEM adhesive, can significantly enhance your vehicle’s appearance. By following these guidelines and steps, you ensure a durable and secure fit, protecting your car’s unique design while adding a touch of personalization. Remember, the key to success lies in selecting the appropriate adhesive and carefully executing each step for long-lasting results.